In this tutorial you will learn how to create 3D signs. You will create simple dollar sign and use the line tool to give 3D effect. Let’s get started!
Tutorial Details
- Used Program: Adobe Illustrator CS3
- Difficulty: Beginner
- Estimated Completion Time: 20 minutes
Step 1: Type a dollar sign
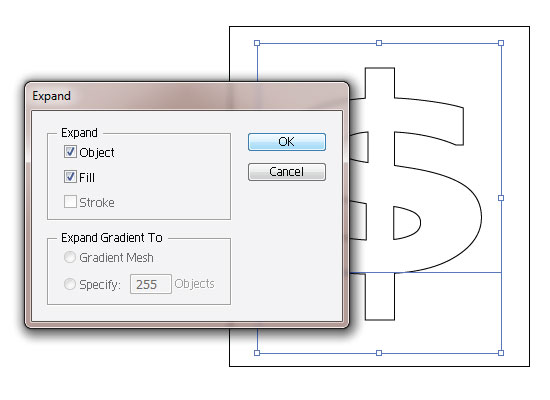
Open a new Document with 300 pixels by 340 pixels. Type a dollar sign with Type Tool and Expand it. (Object > Expand).
Step 2: Create second sign
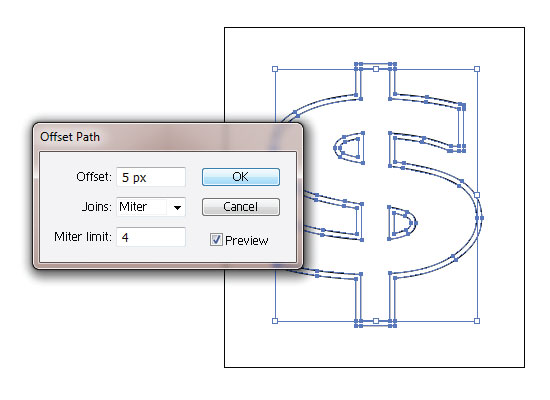
By selecting the sign, choose Object>Path>Offset Path, enter a positive value to create a larger duplicate. I entered 5 pt and clicked OK.
Step 3: Draw lines
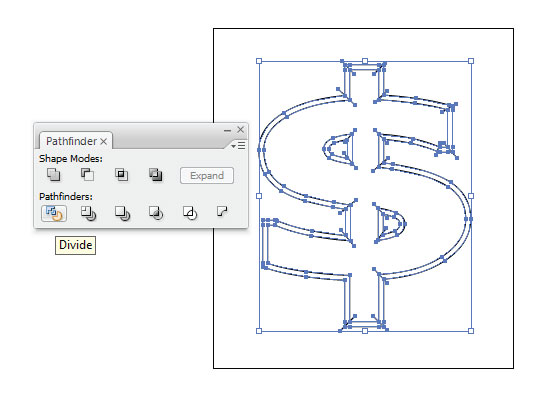
Draw lines to bisect the paths at their corners, select the drawn lines and both dollar signs, and then click the Divide button in the Pathfinder panel.
The Divide button converts all enclosed areas into separate closed paths. Use the Direct Selection Tool to delete line extras. Now you can give any color to your sign.
This is the Final Image
You may also be interested in the following Articles.
- Motorbike Draft Drawing
- Alaska Graphic T-Shirt Printing
- T-Shirt of the Week #5
- Little Bear Vector Graphic
Subscribe to our RSS-feed and follow me on Twitter to stay in touch.
Discover more from Life and Tech Shots Magazine
Subscribe to get the latest posts sent to your email.


