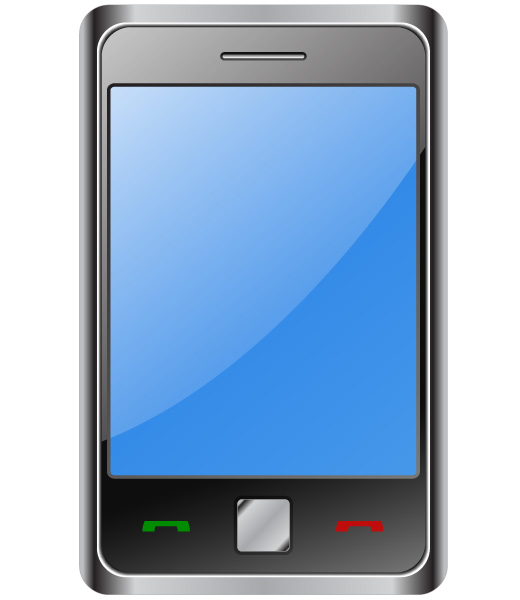
In this tutorial, we will learn how to create a stylish mobile phone. I will show you working with gradient tool and pathfinder to reach our last result. Primarily basic shape tools will be used. Most of the coloring is done using gradient tool with different colors so that you can choose colors according to your tastes and needs.
Final Image Preview
Below is the final image we will be working towards.
Tutorial Details
- Program: Adobe Illustrator CS3
- Difficulty: Intermediate
- Estimated Completion Time: 1 hour
Step 1
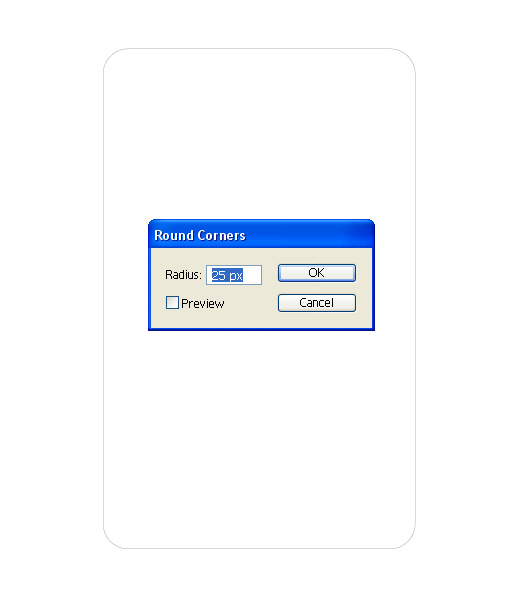
Create new document with 520 pixels by 600 pixels. Draw a rectangle with 312 pixels width and 500 pixels height. With the rectangle selected, go to Filter > Stylize > Round Corners and change the Radius to 25 pixels and press OK. Also, apply a 0.5 pixel stroke with 30% Grayscale.
Step 2
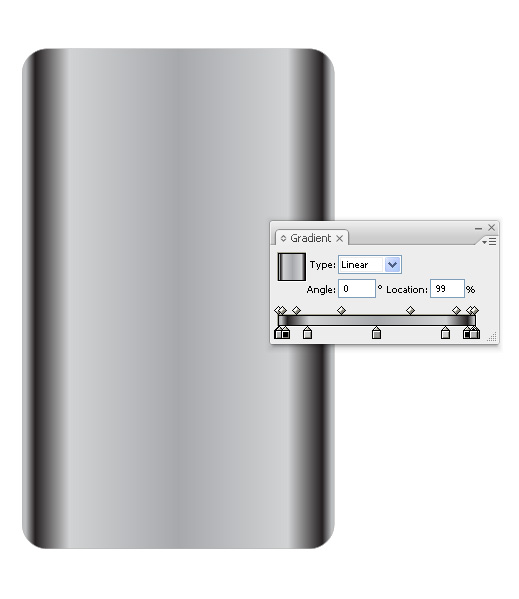
Then apply a linear gradient color to the rectangle. We will use 9 different black swatches as written below:
1. Black 30% – Location of this slider is 0%;
2. Black 30% – Location 1%;
3. Black 100% – Location 4%;
4. Black 30% – Location 15%;
5. Black 40% – Location 50%;
6. Black 30% – Location 85%;
7. Black 100% – Location 96%;
8. Black 30% – Location 99%;
9. Black 30% – Location 100%.
Step 3
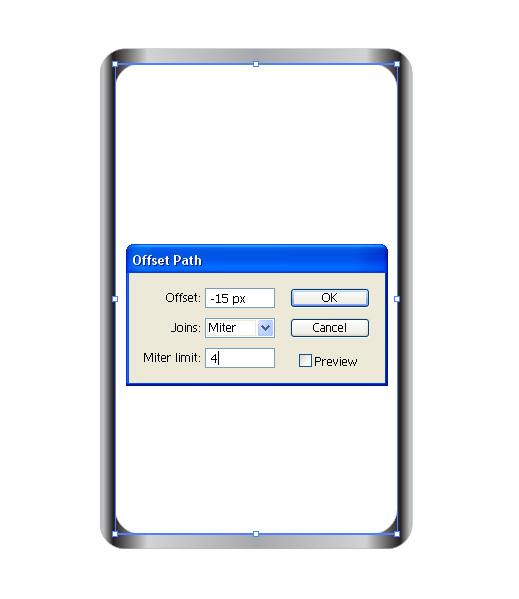
With Rectangle selected go to Object > Path > Offset to open the Offset Path dialog. Change the Offset to -15 pixels and press OK. Change the color to white.
Step 4
With Smaller Rectangle selected go to Object > Path > Offset to open the Offset Path dialog. Chan the Offset to -1 pixels and press OK. Then apply a black color to the smallest rectangle. This time with the smallest rectangle selected go to Effect > Stylize > Feather to open Feather dialog. Change the feather radius to 4 pixels and press OK.
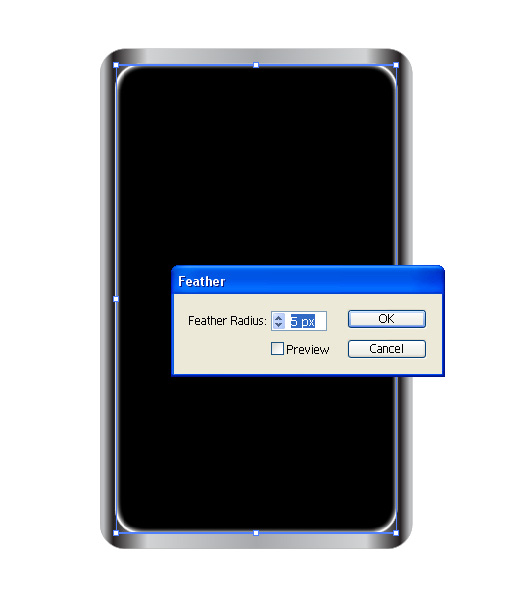
Step 5
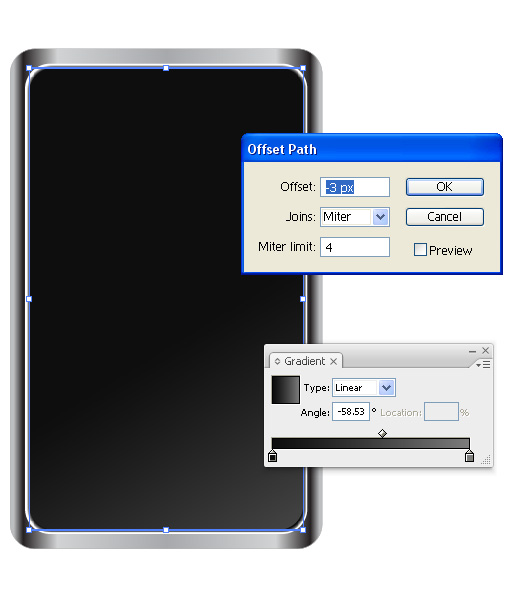
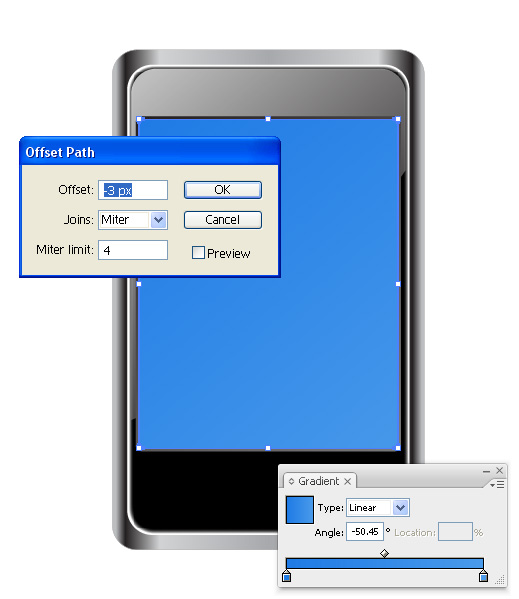
Again with the smallest black rectangle selected go to Object > Path > Offset to open the Offset Path dialog. Change the Offset to -3 pixels and press OK. Then apply a linear gradient color to the rectangle as shown in the picture. Don’t forget to delete feather function from this rectangle.
Step 6
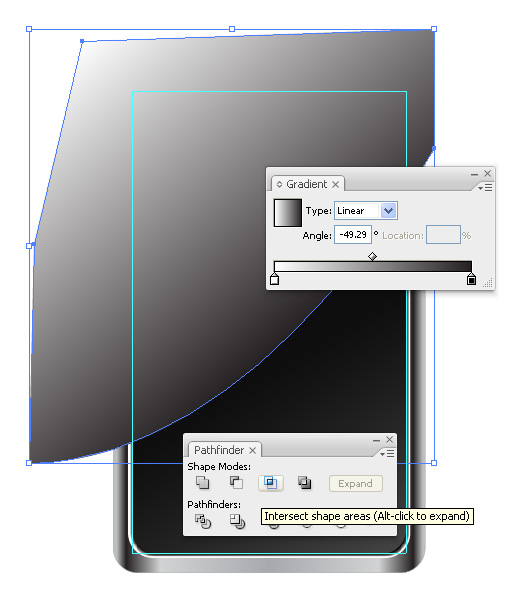
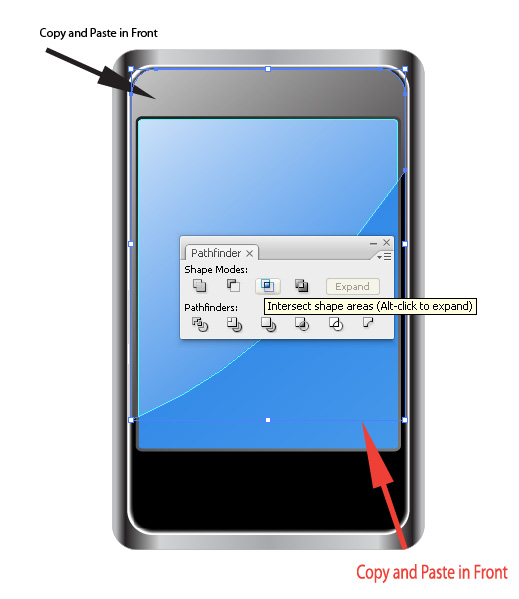
Use the pen tool to draw a shape and apply a gradient as shown below. Copy (Ctrl + C) the last rectangle and paste in front (Ctrl + F) of it. Select both shapes and choose intersect shape areas from the pathfinder tool. Make Transparency Opacity Screen 75%.
Step 7
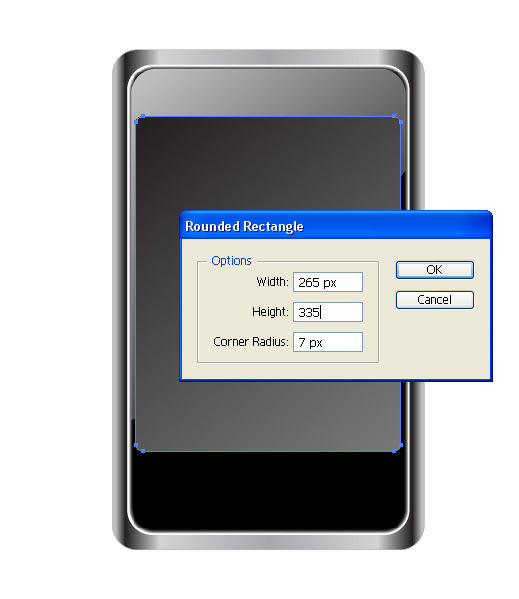
Now draw a rounded rectangle with 265 pixels width and 335 pixels height and apply a gradient as shown below.
Step 8
With New Rectangle selected go to Object > Path > Offset to open the Offset Path dialog. Chan the Offset to -3 pixels and press OK. Then apply a gradient as shown below.
Step 9
At this step we will repeat step 6. Copy (Ctrl + C) the last blue rectangle and shape we created at the step 6 then paste in front (Ctrl + F) of them. Select both shapes and choose intersect shape areas from the pathfinder tool. Make Transparency Opacity Screen 75%.
Step 10
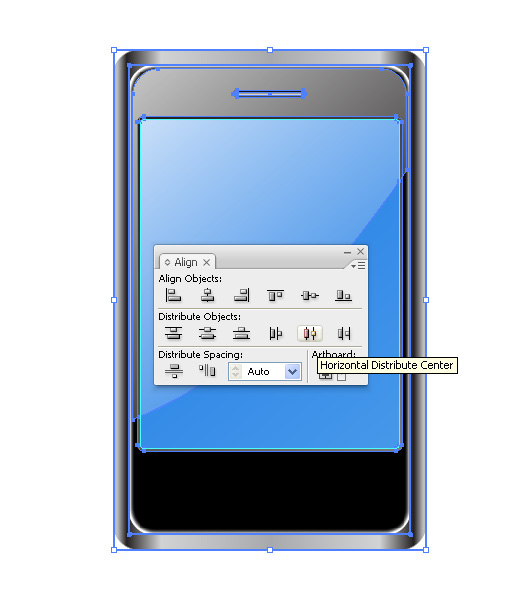
Group all elements. Draw a rounded rectangle with 73 pixels width and 7 pixels height, radius is 7 pixels. Then apply a black color. With Rectangle selected go to Object > Path > Offset to open the Offset Path dialog. Chan the Offset to -2 pixels and press OK. Then apply a black and white linear gradient. Group two new rounded rectangles and place them at the top of the phone.
Step 11
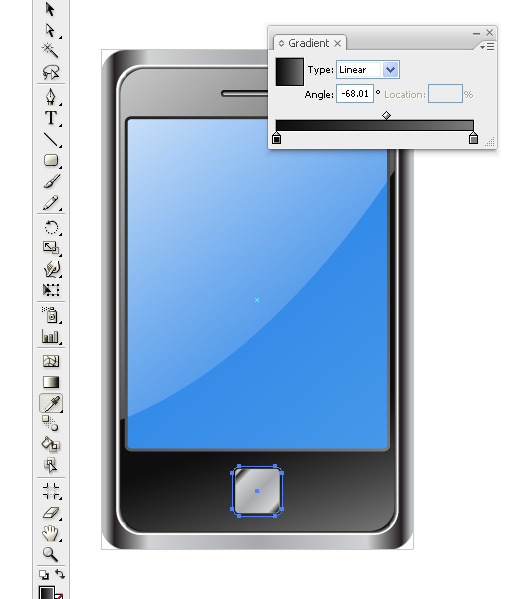
Draw a rounded rectangle with 50 pixels width and 50 pixels height, radius is 7 pixels. Then apply a gradient as shown below. With Rectangle selected go to Object > Path > Offset to open the Offset Path dialog. Chan the Offset to -3 pixels and press OK. Grab the Eyedropper Tool from the tools panel and click on the biggest rectangle. Adjust the orientation of color from top left to bottom right.
Step 12
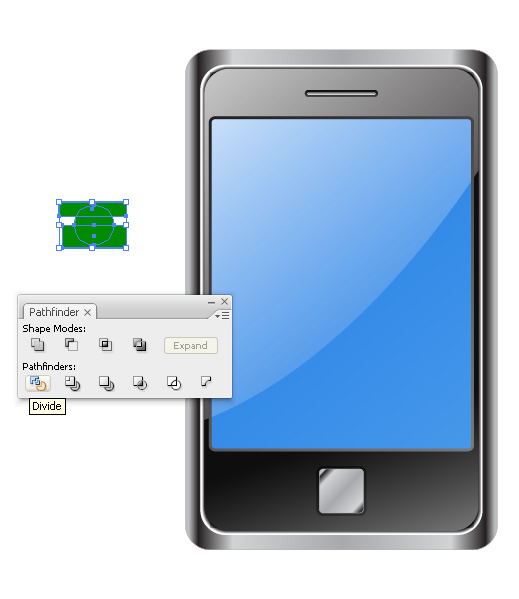
Draw a Ellipse with 40 pixels width and 40 pixels height. Then apply a green color as shown below. Then draw two rectangles bigger than ellipse. Put on of them on the top of the ellipse, the other one on the bottom. Select three shapes and choose divide from the pathfinder tool. Delete all parts except the shape as shown below.
Step 13
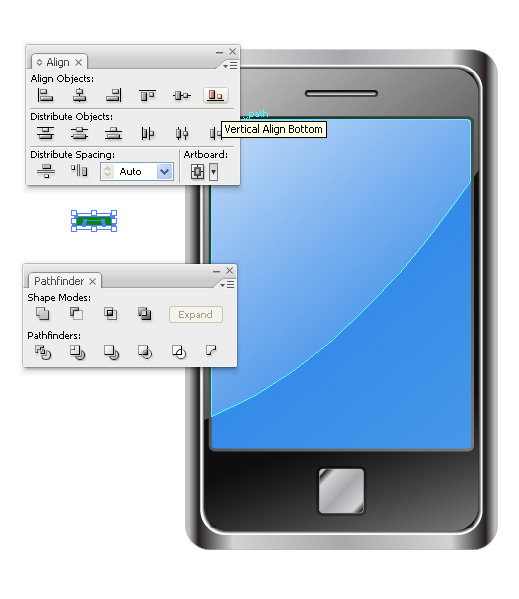
Copy (Ctrl + C) the last shape and paste in front (Ctrl + F) of it. Make its size two times smaller than bigger shape. With two shapes selected choose Vertical Align Bottom from Align Panel. Again Divide them.
Step 14
Copy (Ctrl + C) and paste (Ctrl +  V) it. Apply a red color to the second shape. Place green (Phone Call) shape to the left and red (Stop Call) shape to the right of the Phone.

Conclusion
You can download .ai and .eps formats below. I hope you enjoy the tutorial and leave your comments.
Subscribe to our RSS-feed and follow us on Twitter to stay in touch.
Discover more from Life and Tech Shots Magazine
Subscribe to get the latest posts sent to your email.
awwwssum phone
Thank you this is great tutorial!
Thanks! This was understand.
yes you can translate, thanks
Good post! Do you mind if I translate this into Italian for my blog?
Hi, I really like your tutorial, it was easy to understand for me. I mean explanation is simple, even for those who don’t know English very good, like me.
How to Create a Stylish Phone in Illustrator Iconshots comPretty good post.6/8/2010
How to Create a Stylish Phone in Illustrator Iconshots com best post. I has been collection in my blog. 2010/01/01
found your site on del.icio.us today and really liked it.. i bookmarked it and will be back to check it out some more later
Thanks for sharing, this really cool stuff. Love it. Keep it up.
thanks for all comments, in the next few days I will publish a tutorial about interface
Hi, I don’t have Illustrator, but I wish that I did. You made this so easy to follow along with, great tutorial.
I’m glad you joined Blog Engage. It’s nice to find your there.
Thanks.
@Ileane
Sadik, any media player interface samples in your artworks to release?, or tutorials?
Thanks again.
Keep posting stuff like this i really like it